 Elven Cube with Armor Pods
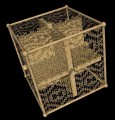
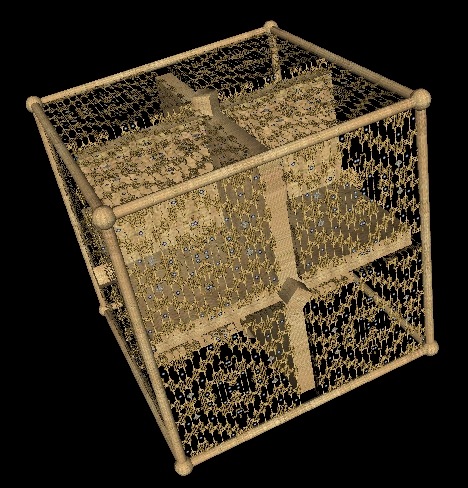
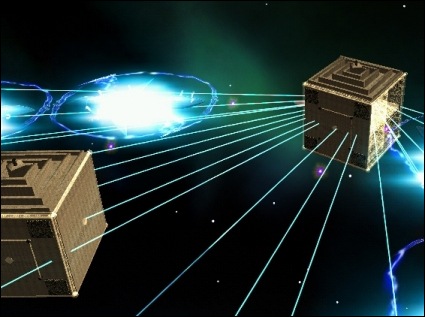
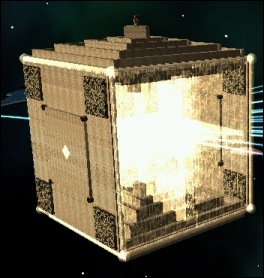
This is the Elven Cube by Elrond for Star Trek Armada II. Its uh, a strange looking thing, its more like a flying building really then a starship, but that scores it creativity points. I think the texture used here could be a little better, it seams to have a tile effect that i dont like, again giving it a brick and building kind of feel, but overall its a good modeling job. Download if you want.
Mod Material: Elrond's First Model: Elven Cube with Armor Pods
Mod Date: 2005.02.13
Author: Elrond
Materials Developed:
Admirals Log Images: Elrond
Odf Files: Elrond
Installation Instructions: Elrond
SOD Models: Elrond
Textures: Elrond
Build Button: Elrond
Wireframe: Elrond
TOC (Table of Contents):
A. Rationale for this mod.
B. Installation of this mod.
1. Extracting files to correct folders.
2. Instructions for putting ship in game.
3. Instructions for placing buttons and wireframes (sprites).
C. Uninstalling this mod.
D. Statement of Use of this mod.
A. Rationale for this mod:
For years, I have been modifying Star Trek Armada 2 by editting odf files, textures, build buttons, wireframes,
weapons, gui (graphical interface), adding races, adding ships and stations, adding references in the input.map file,
adding references for sprites in the gui_global.gui file and other sprite files, techtree references, bitmap images for
the Admirals Log, AI editting, making maps, and making sounds and music for the game. I had performed just about every
operation to mod the game - save one: making my OWN ship model. I set forth on the task of learning GMax and Milkshape
3D (for those users who don't know what those are, they are programs that give you the ability to make your own models
or change existing ones). For nearly a week up to this point, I have been spending time (some of which should probably
have been used toward doing laundry, working, cleaning, etc, but so what!) learning MS3D and GMax, both of which I
recently purchased and had been meaning to try. The result of this goal is this mod: my very first ship (my first
successfully-created ship).
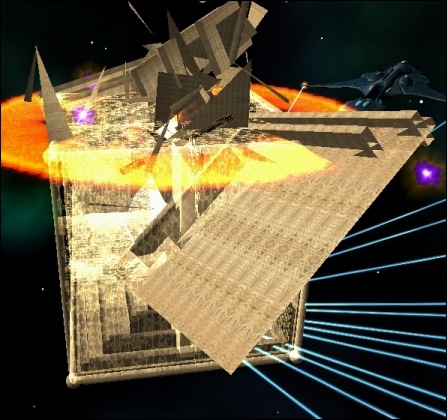
Thus, here you are, downloading this mod and hopefully using it in your game!!! The ship is very different from
anything that (I) have personally encountered, though it shares the likeness of a ship we've all seen before - a cube.
However, this cube is not a Borg Cube but is a ship of the Elves. In my personal mod, which I am calling "Universal
Armageddon", later on in the later maps, the United Federation of Planets (soon to become the United Federation of
Galaxies), is overwhelmed by the greatest of enemies, the Universal Conquerers. The Elves, which had disappeared from
normal existance nearly 7,000 years before that time, have now returned with a mission to assist humanity in liberating
itself from the grips of this deadliest of enemies (deadlier than Sauron or even Morgoth - if you're familiar with
Tolkien's writing). The first item I designed for the Elves most likely will not be used in my final mod, as it is
my first ship design and I really wish to place my paper-based designs of my Elven ships into digital 3ds and SOD format.
Therefore, this ship is not going to be in the Universal Armageddon Mod, though I think it is really cool. Keep in mind
that this ship is the culmination of my efforts over the last week and since I haven't had that much experience with
MS3D or GMax, things may be a little rusty - but in my opinion, it is still a good first try. Therefore, I am like the
'new kid' in ship and station modelling, so go a little light! :-)
B. Installation of this mod:
1. Extracting files to correct folders:
Hopefully you have done this before. Most everyone has used WinZip or WinRAR to extract files, but if you haven't,
then it would be a good idea to mess around with those programs so that you know what you are doing.
Extracting the files is actually just a simple matter of dragging ALL the folders in the archive to your Armada 2
install directory; however, if you want to just extract the files out of each folder separately, here's how and
where to send them:
Files Extract to this folder of your ARMADA INSTALLATION FOLDER
Admirals Log BMP Files:
*.bmp /bitmaps/AdmiralsLog/ShipImages
Textures:
eCube01.tga, eCube02.tga, /Textures/RGB
eCube03.tga, eCube04.tga,
wecube.tga,
gbecube.tga,
wecpod01.tga,
gbecpod01.tga,
wecpod02.tga,
gbecpod02.tga,
wecpod03.tga,
gbecpod03.tga:
Models:
*.SOD (all SOD files): /SOD
ODF Files:
pod_weapon.odf, /odf/stations
research_movable.odf:
*.odf (all other odf files): /odf/ships
That's it! You've hopefully extracted all the files to the correct folders.
Simple version of above:
*.bmp: /bitmaps/AdmiralsLog/ShipImages
pod_weapon.odf, research_movable.odf: /odf/stations
all other *.odf: /odf/ships
*.SOD: /SOD
*.tga: /Textures/RGB
Well, that's not it - YET. Don't start drinking in celebration quite yet. There's still more to go if you want to
use this ship and its armor pods in the game!!!
2. Instructions for putting ship in game:
Now that all your files are in the right places (if they are not, go back and do it again!), you must now ensure
that this ship and its pods will work in the game.
To build the ship in the game, you MUST have a shipyard build it - actually, I would recommend that a construction
ship build this ship, as it is quite large. If you have a large enough shipyard to build it in, then follow
STEP I. If you will be building this with a Construction Ship, then on to STEP II.
STEP I: Putting the ship in a shipyard:
01) Open a shipyard odf file (for instance, fyard.odf, byard.odf, etc) in a text editor. Notepad will do.
02) You will see something in the shipyard file like this:
buildItem0 = "fscout" (if it's the fyard.odf file)
You will also see other 'buildItem' references there. If the shipyard has buildItems the whole way
up to 'buildItem12', then you will have to find another shipyard because the most that I found a
shipyard or construction ship can build is 13 (including buildItem0).
03) Now that you have found a shipyard to do this in, you will have to add another 'buildItem' reference.
To do this, you MUST ENSURE that the buildItem you add is not followed by a number that is the same as
one of the above. For example:
---------> (shipyard file): place this in any available shipyard with available space:
buildItemX = "ecube"
---------> buildItemX: X = the number of the next available buildItem.
THE RIGHT WAY:
buildItem0 = "fscout"
buildItem1 = "fdestroy"
buildItem2 = "fcruise1"
buildItem3 = "fassault"
buildItem4 = "fcruise2"
buildItem5 = "fcruise3"
----> The next line is where you put the Elven Cube:
buildItem6 = "ecube"
THE WRONG WAY:
buildItem0 = "fscout"
buildItem1 = "fdestroy"
buildItem2 = "fcruise1"
buildItem3 = "fassault"
buildItem4 = "fcruise2"
buildItem5 = "fcruise3"
----> The next line is incorrect, as it uses the same buildItem that another one does.
buildItem5 = "ecube"
As you can see, the builditems must be sequential from 0 to 12. You should not repeat a buildItem or
skip buildItem numbers.
04) Now that you have added the ship in your shipyard, you will now save your editted shipyard odf file
as you would save any text file - make sure it's an odf file and make sure that it's the same
name it was before, as you don't want to have another headache to deal with!!!
05) OK - you're not done yet! You will have to make a techtree entry. To do this, open the tech1.tt file
in a text editor.
-------> tech1.tt
06) Scroll down and find a reasonable place to create an empty line and then ADD THIS IN THE TECH1.TT file:
ecube.odf 0
ecubepod01.odf 1 ecube.odf
ecubepod02.odf 1 ecubepod01.odf
ecubepod03.odf 2 ecubepod01.odf ecubepod02.odf
ecubepod04.odf 3 ecubepod01.odf ecubepod02.odf ecubepod03.odf
ecubepod05.odf 4 ecubepod01.odf ecubepod02.odf ecubepod03.odf ecubepod04.odf
ecubepod06.odf 5 ecubepod01.odf ecubepod02.odf ecubepod03.odf ecubepod04.odf ecubepod05.odf
Putting the above lines in this order and just as they are is IMPERATIVE, as the pods that are
created by your ship will look different from pod-to-pod. The ship and pod odfs are set up in
a way so that the first pod will be build on one hardpoint, then the second will be created on
the next, and so on. If this is allowed to be out-of-order, then your pods will look funky on
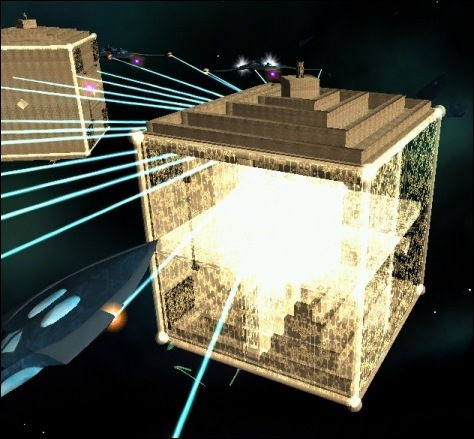
your ship. The pods generated are flat and are placed on a cube. They are all oriented
differently. Just to give you an idea of what it may look like if you don't have the techtree
as it is above, the wrong pods built in the wrong places WILL NOT CRASH THE GAME, but a pod
that is placed in the wrong axis will be partially inside the ship and partially outside and
will look like someone shot a giant bulkhead into the center of the ship - that looks very
stupid.
3. Instructions for placing buttons and wireframes (sprites):
OK - now you can actually see the ship in the game. And you can also build the pods. The ship is already set with
a pre-determined set of weapons - but you can change these if you go in a text editor and edit the
ecube.odf or ecubepod0*.odf files. Check Westworld's Big Book of Modding for tips on editting weapons.
Now you will be adding entries for the buttons and wireframes. You will see the button when you go to build the
ship (in the button area). The wireframe will be displayed when you select the ship. Follow these simple steps to
have your ship do this in the game:
----------> gui_global.spr:
01) OPEN the gui_global.spr file in your /SPRITES folder of your Armada 2 install directory. Use a text editor.
02) SCROLL down the list of numerous entries to:
# Federation build buttons
03) Then you will SCROLL down the list of more entries to:
@reference=64
04) MAKE A NEW LINE under that line and TYPE OR COPY in the following:
b_ecube gbecube 0 0 64 64
b_ecubepod01 gbecpod01 0 0 64 64
b_ecubepod02 gbecpod01 0 0 64 64
b_ecubepod03 gbecpod02 0 0 64 64
b_ecubepod04 gbecpod02 0 0 64 64
b_ecubepod05 gbecpod03 0 0 64 64
b_ecubepod06 gbecpod03 0 0 64 64
OK - now on to step 5:
05) You have placed the entry for the build button and now must do the wireframe.
SCROLL down to:
# Wireframes
# ----------
06) After that, SCROLL some more down to:
# Federation wireframes
07) After that entry, PLACE THIS ENTRY:
@reference=512
08) MAKE A NEW LINE and PLACE THIS IN THAT EMPTY LINE:
ecubew1 wecube 0 0 512 512
ecubepod01w1 wecpod01 0 0 512 512
ecubepod02w1 wecpod01 0 0 512 512
ecubepod03w1 wecpod02 0 0 512 512
ecubepod04w1 wecpod02 0 0 512 512
ecubepod05w1 wecpod03 0 0 512 512
ecubepod06w1 wecpod03 0 0 512 512
09) Now you have finished inputting the button and wireframe entries. You are DONE with gui_global.spr.
10) Now that you're done, SAVE the file gui_global.spr, as that's what you do when you are done editting
a file (I'm sure you know that - hopefully - I'm just not assuming anything)! ;-)
* Important Note: The wireframes for the pods may not work - for some reason, wireframes on these pods do not seem to be
working yet - there may be another version out sometime that will include perhaps new wireframes and/or
the odf files for the pods and/or new readme file for new entries. The wireframe for the ship itself works. All
buttons work - all weapons work as well - no problems with anything else.
C. Uninstalling this mod:
01) Remove the files from your folders:
/bitmaps/AdmiralsLog/ShipImages: *.bmp
/ODF: ecube*.odf, pod_weapon.odf, research_movable.odf,
/SOD: ecube*.SOD,
/Textures/RGB: eCube*.tga, wecube.tga, gbecube.tga, wecpods.tga, gbecpods.tga,
02) That's it! Now if you already added references to these pods or the ship, or the tga files or to the
models themselves, it would be a good idea to change those references first. Make sure you keep
backups of your files because, as you read on, you will notice that I am in no way responsible for
anything this download may do to your game or system (I don't know what it would do to your system,
but I must mention it). BE SMART and have COMMON SENSE when adding files and editting files -
backing up files is a MUST for EVERYBODY!!! Even if you are an expert at modding Armada 2, I still
believe that you should back up your files. Crashes or problems in the game caused by this mod are
not the only reasons you should back up - hard drives crash all the time. Don't become a statistic
as I know I have before when I lost three months of work - that is what I call a catastrophe! Don't
let it happen to you!
D. Statement of Use of this mod:
All materials created in this archived file were created by me (Elrond). There are none other to credit, save for
perhaps the members of armadafleetcommand - that includes:
CaptSyf, CaptBenSisko, Phantom (that SOD tutorial on making the Bradbury class starship rules!), any others I did
not get a chance to mention! Pretty much the entire community is responsible for all I have learned in such a small
amount of time (two years). Members of Armadafleetcommand and Armada2files have given me ideas, provided advice on
things I didn't understand, and led ultimately to me being motivated enough to begin and continue a large-scale
mod that I have been doing now over two years! Thank you dudes!
Now you know what the last part is about - it's what we all must say in our readme files, but it is very important and
prevents things from happening that shouldn't!
I am in no way liable for the effects of this mod. This mod has been tested (like my other mods) on two operating system
platforms, including Windows 98 and XP SP2. This mod was also tested using Armada 2 patch 1.2 - the most recent patch to
this date. The material that this file concerns has in no way anything to do with Activision or those who created Armada 2.
Do not attempt to make money off of this mod - doing so is for one thing a bad idea and secondly, it ticks off the people
who originally created it - any person who has created something values that statement. This mod has been released to the
Armada and Armada 2 modding community - that means that it is free of use and is not to be in any way capitalized upon.
Now enjoy this mod. Most questions about its operation in the game can be answered by Westworld's Big Book of Modding -
that can be found on armadafleetcommand.com and also armada2files.com. Viewing those documents will prevent you from feeling
like you've asked a stupid question.
This mod is also my tribute to the modders that are no longer a part of the modding community. It is also my tribute to the
December '04 Tsunami victims, to our troops and the troops of our allies - some of which have been severely injured or killed
in combat, to peace in my nation, to peace in your nation (wherever you are from), and to hope and a peaceful and productive
prospect of the future (that in part has been brightened by Star Trek's principals and visions of the future).
Take care and enjoy this mod. I can only hope that you enjoy playing the game with this ship as much as I enjoyed creating it!
- Elrond, New Rivendell (PA)
| Version | Author | Elrond | Website | ||
| Downloads | 331 | Size | 2.59 MB | Created | 2005-02-17 |